

A little while ago, someone asked on my DeviantArt how I made my Hetalia pairing pendants. So, here's how:
___Materials___
- polymer clay
- heart-shaped cookie cutter (obento food cutters also work)
- wire (22 guage)
- round-nose pliers
- long-nose pliers (jeweler's pliers without teeth)
- wire cutters
- cornstarch or baby powder or talc powder
- dough roller (any kind of hard cylinder; plastic is better; pores in wood causes problems; or use a pasta machine)
- glass marbles
- ruler or other straight-edge
- needle tool
- craft knife
- flexible blade for polymer clay
- string
- oven

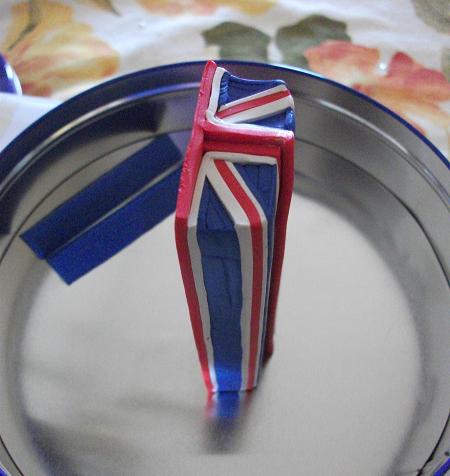
Most importantly, gotta make a bunch of flags out of polymer clay. These millefiori canes are based on reference pics of country flags, found online. Since each face of a pendant will only show half of a flag, there's no need for the millefiori canes to be more than half of a flag. This saves on polymer clay. It is important that the width of the canes at least cover the width of half the heart-shaped cookie cutter to be used.

Roll the clay out through a pasta machine (setting 2 or thicker), or by hand, with a roller. Dust clay or work area lightly, with cornstarch or baby powder to prevent sticking. Then use a heart-shaped cookie cutter on the rolled slabs of clay.
Use a ruler or other straight-edge to mark the center line of each heart base.
Use the same cookie cutter to trim the edges of each heart. Askew the cutter by 2 millimeters, using the center line as reference points. I like to center the vertexes of the heart, at the top, then bottom of the line, 2mm from the clay's original edge, then cut. That leaves odd points at the left and right of the heart, which can be trimmed with the cookie cutter.

Make a wrapped-loop eye out of wire, using the long-nose and rounded-nose pliers. I used 22-guage wire, but 24-guage might be equally sturdy.
Sink finished wrapped-loop eyes into the center line of each heart base. Do not sink the eyes too far down the heart. Ideally, the whole eye should be above the cane slices, even after they are applied (2mm further out of the base clay's edges).

Next, cut slices off of the millefiori canes. Try to make the slices thin, to save on polymer clay, but not too thin. If they are too thin, they may be almost transparent enough for the scrap clay base underneath, to show through. You don't want that. Also, an intended thin slice has the danger of inadvertently cutting less than a whole slice, off the millefiori cane. That is even more wasted clay. Still, if this happens, these partial slices can be saved to patch-up other imperfect slices.
Cut half-hearts out of the cane slices. This is where the canes prove themselves to be wide enough or too narrow. If they are too narrow, the gaps can be patched up with the proper color clay.

Apply the cane slices to the base hearts. Use the center line on the base hearts, to align the cane sliced hearts, one half-heart at a time.
Handling the clay with glass marbles, instead of your fingertips, helps minimize fingerprints on the clay. If there are fingerprints, you can smooth them out with the glass marbles. But this can take a long time, without preventing them in the first place.

Pinch the edges of the cane sliced hearts together. If the base hearts were trimmed enough, there should be no gap, showing the scrap clay underneath. But if the base hearts were trimmed too much, the cane sliced hearts may collapse into themselves, without enough base clay to support it underneath.
Apply small details, as necessary, for each type of flag.
Press them into the cane slices, using glass marbles. But do not distort them by squashing with too much force.

As you can see below, soft clay does not make very good, pulled millefiori canes. The distortion may be too much. When using softer clay, instead, make a pulled mold of the needed shape, from a rubber stamp and some scrap clay.

Bake the clay according to manufacturer's instructions. Use a pie plate or some other baking tray, lined with foil. Cover the container with a foil tent to catch the chemicals which will evaporate off the clay during baking. If you use an oven specifically for polymer clay and crafts, this tent is unnecessary. But it is safer to tent clay, when using an oven that will also be used to bake food.
After the clay cools, string the wire eye, and you're all set!
(...Extra credit for buffing, polishing, and/or varnishing the finished clay with Varathane.)

Are you mail-selling? I'm too lazy and broke to make them :(
ReplyDeleteCould you make an Italy/HRE one for me if you are?
They're so cute ^^
(undertakerkuroshit@gmail.com)